Is there anything wrong with storing the solar panels until power shortages happen, and THEN at that time take them out and lay (not secure) them on the ground? Each of my panels has an aluminum frame attached to the solar panel raising it a few inches above the actual ground. I would then use solar panel extension cables to connect the panels to the sogen inside the house. Then after the city grid power comes back on, I then disconnect the solar panels/wiring and put them back into storage. This is sort of like a camping situation, except it is at home.
Does anyone know of any code problems with this kind of setup??? Or perhaps no codes are required in this type of setup?
I don’t see anything wrong with it. You should make a rack they can nicely sit on at an angle because it’ll look nicer and me more efficient than laying flat.
Codes…everywhere different.Just remember heat is wattage killer=make some air space of min 4"
under panels.Some kind of racking would be better,AND at shtf-large &small time solar panels Will be stolen .
In my case, each panel has its own “rack” which can have the angle of tilt adjusted. The rack lies on the ground, with lowest part of panel about 2-4" above ground.
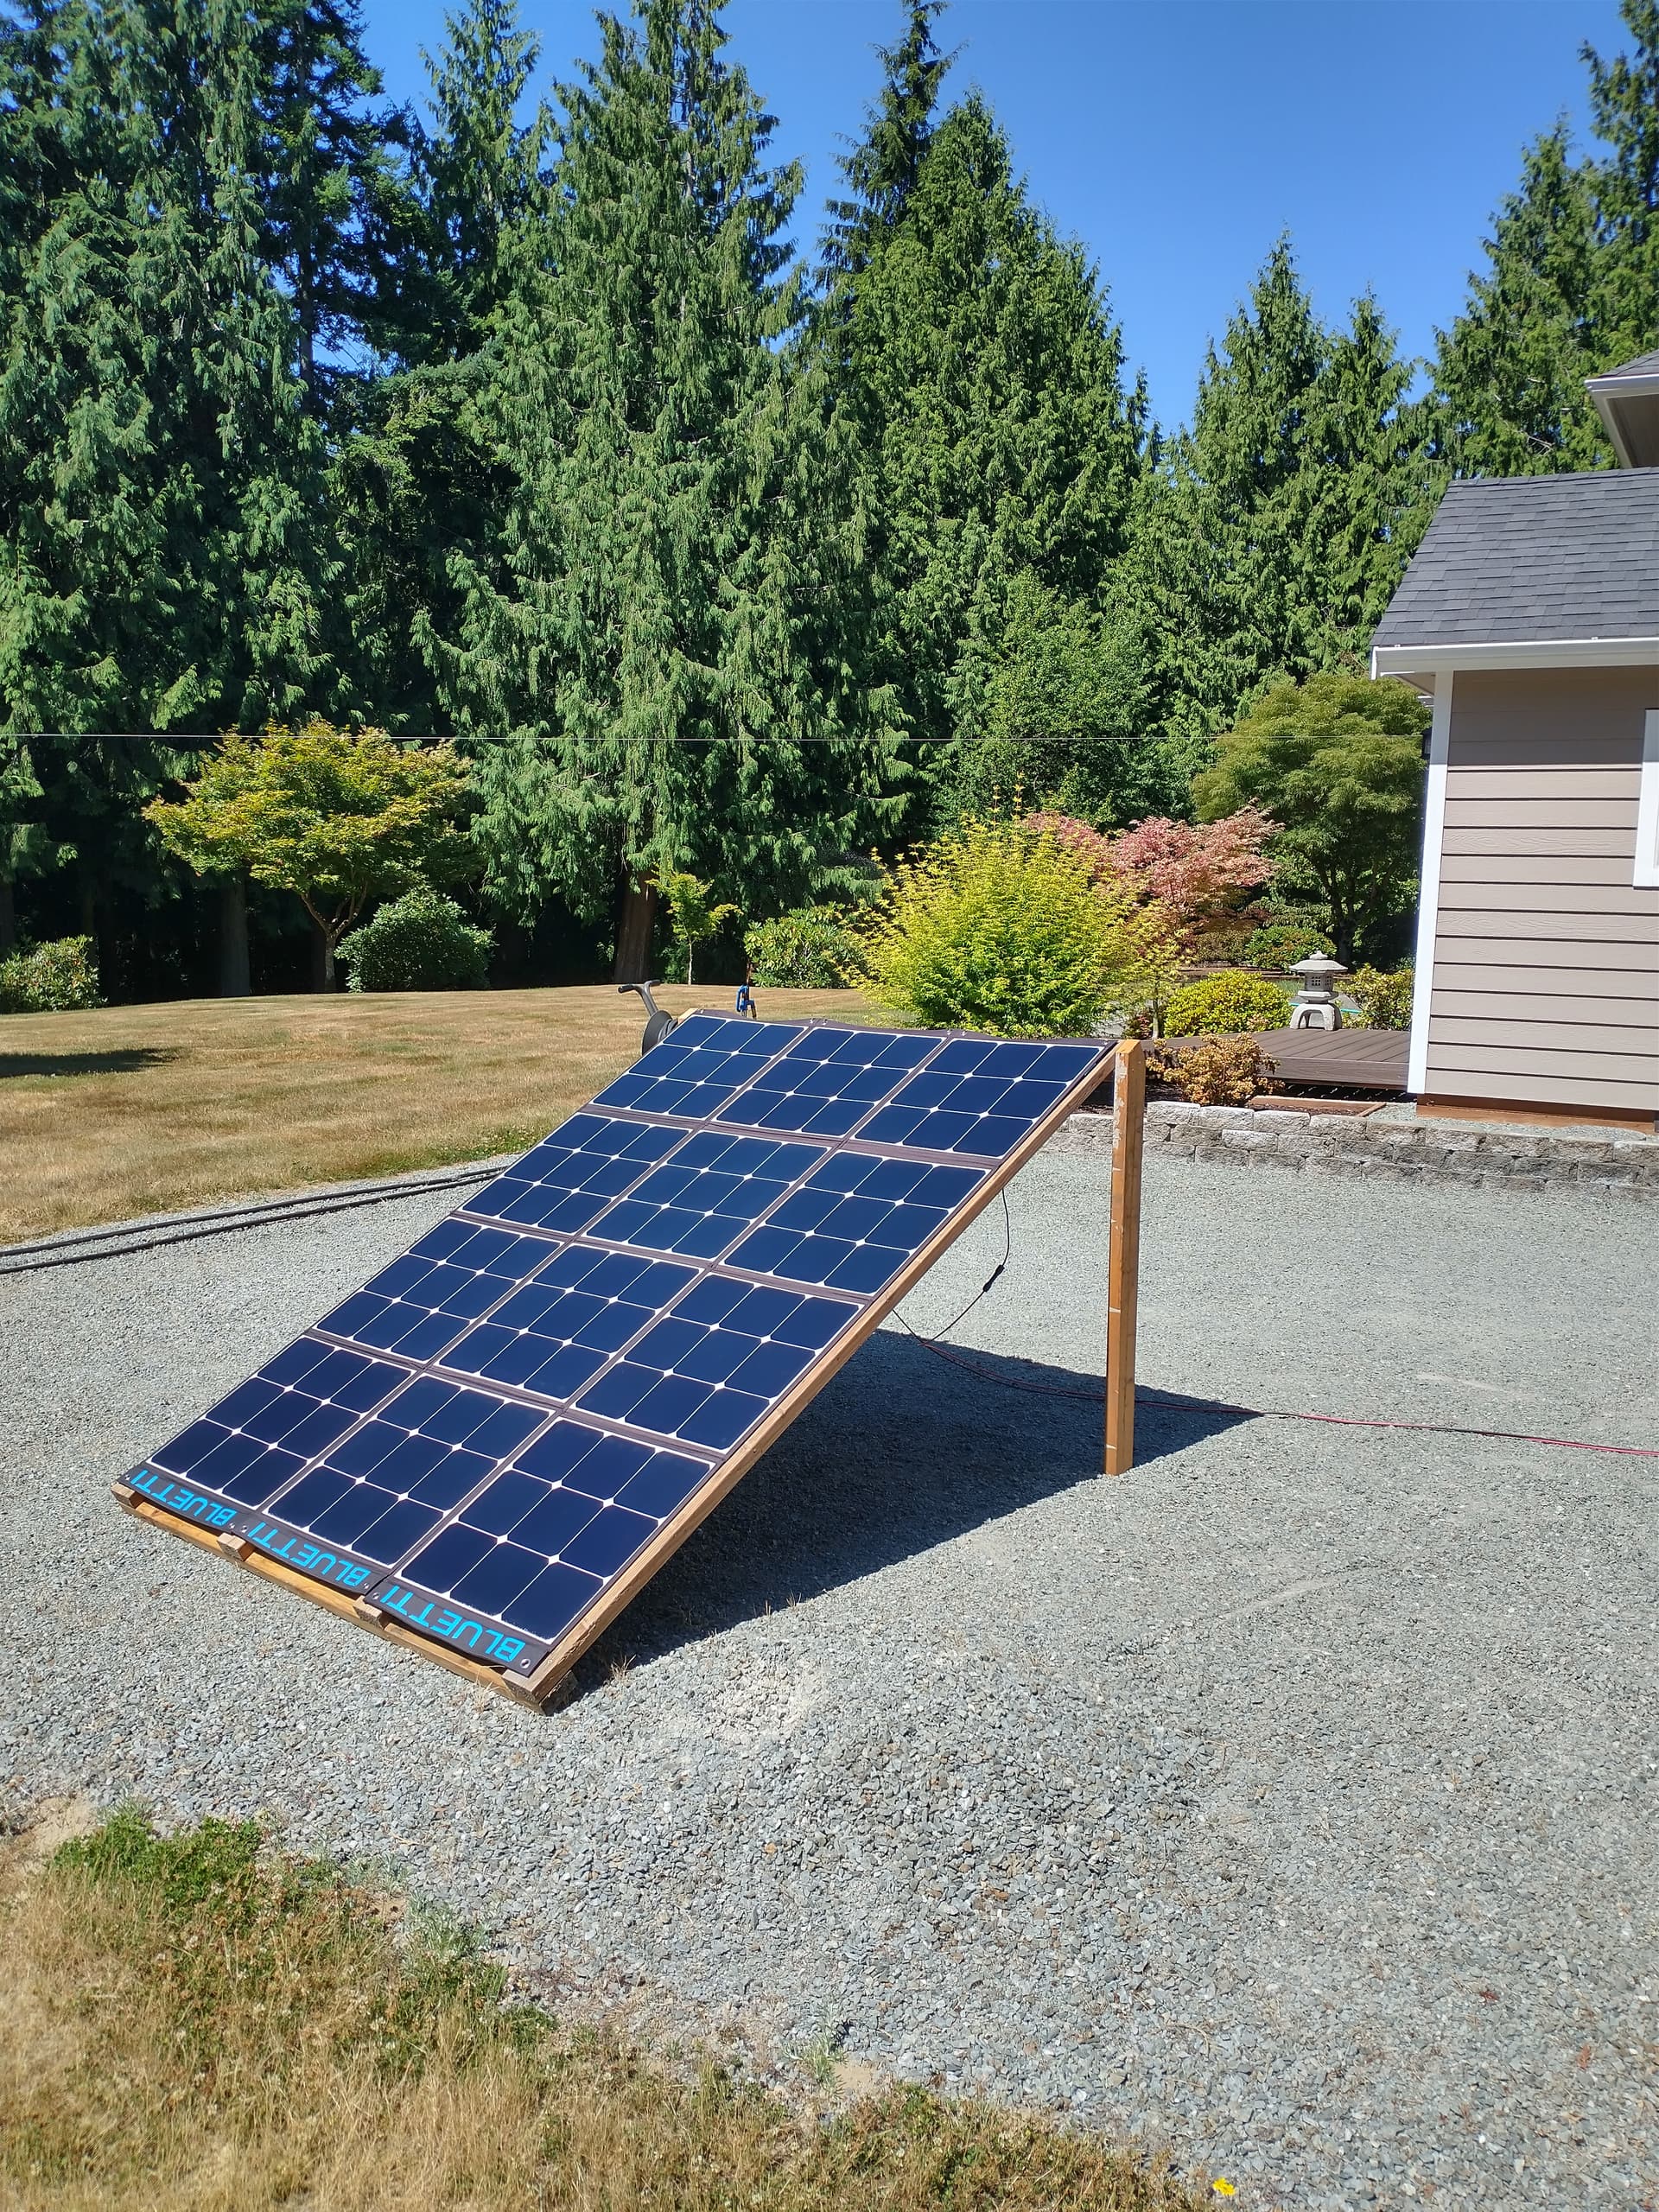
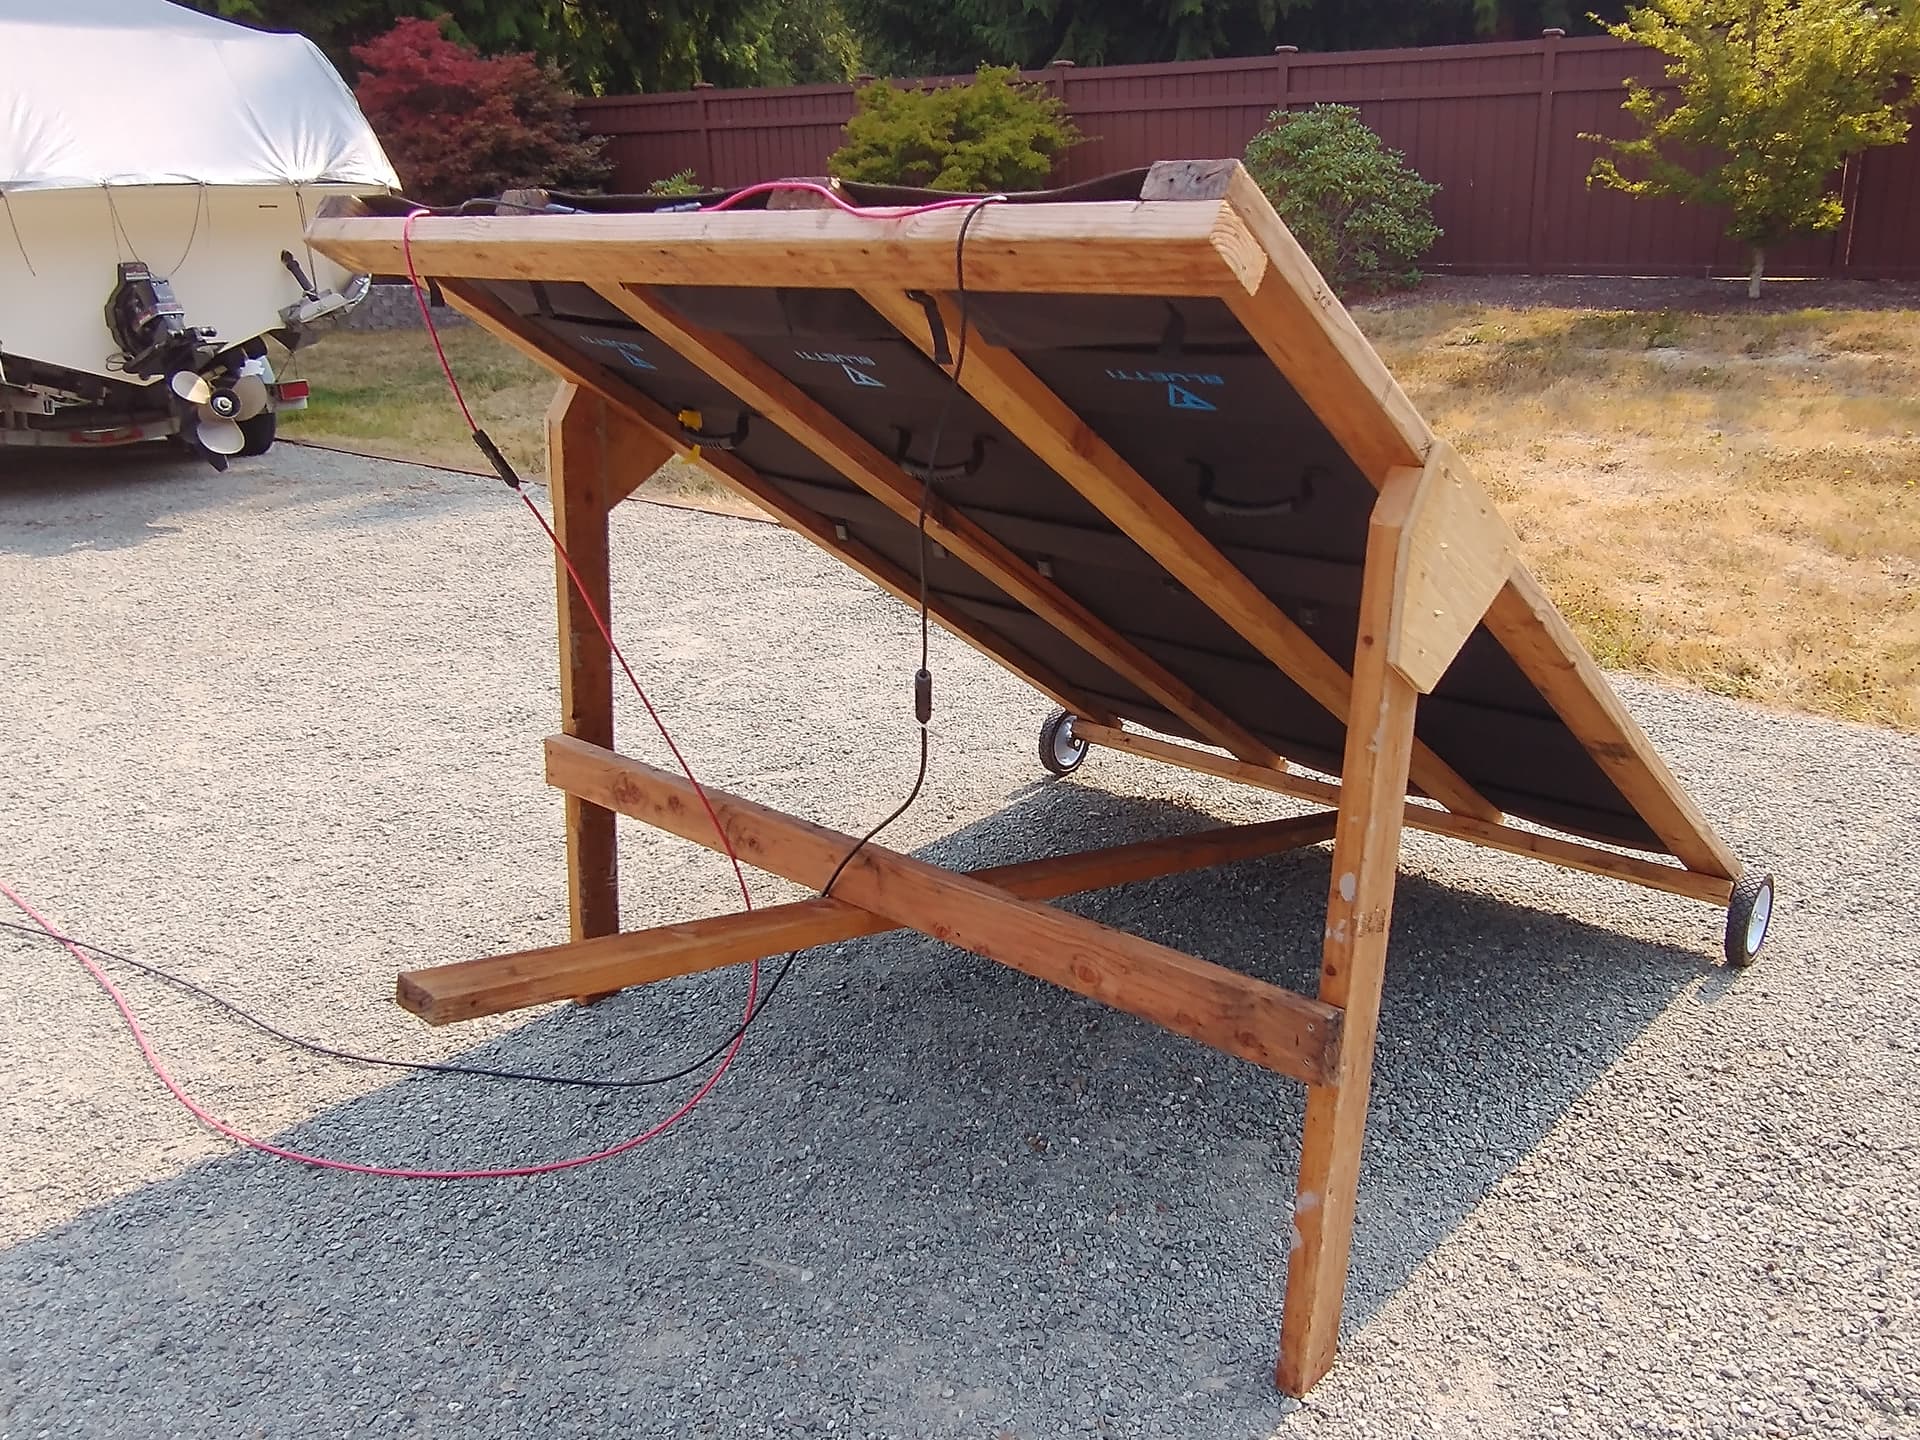
Yeah get them up off the ground for maximum cooling and correct angle. I slapped one together the other day out of scrap 2x4’s for my 3 Bluetti SP200 portables and it makes deploying them when needed much easier. The stand is light enough that I can drag it around to get the best sun angles. Will refine it with wheels and adjustable legs when I get a chance. I use a 70’ extension cable to the garage so the power stations stay out of the elements and are secure.
Eric:
Thanks! Sort of like my idea…I use Renogy’s RV Tilt Mount Bracket for each solar panel, so they are smaller than your setup. They are bolted to each panel. The angle/tilt is adjustable.
What I am doing is what Will Prowse did on his trailer. I have a flat trailer and plan to lay the panel on 2 x 4s laying on the trailer rail putting 3 180 panels (fastening) . This way I can still use the trailer after lifting off 3 or 6 panel and leaning on the fence. You really need that kind of wattage when the power goes out. Don’t lay on the ground without dead airspace under them and that can be done with 2 x 4 s if you dont have a trailer. My trailer is flatbed with 18 inch rails like Wills.
@eric102 this is a killer setup man! Definitely will save these pics for future inspiration! I think you and @SoulGen have some of my favorite concepts I’ve seen so far!
I have 3 Bluetti 200W panels (want to get a 4th soon) and was thinking of doing something like this. How do you have the panels attached? I was thinking of using hooks with the grommets and rubber straps between the ribs that would hook to the wood frame, to make them extra secure. This way I can leave the frame out and just hook on the panels when I need them, vs stowing arrays under the big array like I did with those SP120 arrays. But I think I would have to use only two panels per array in order to hang them and to move the array, as 61" + wide would be hard for me to move alone.
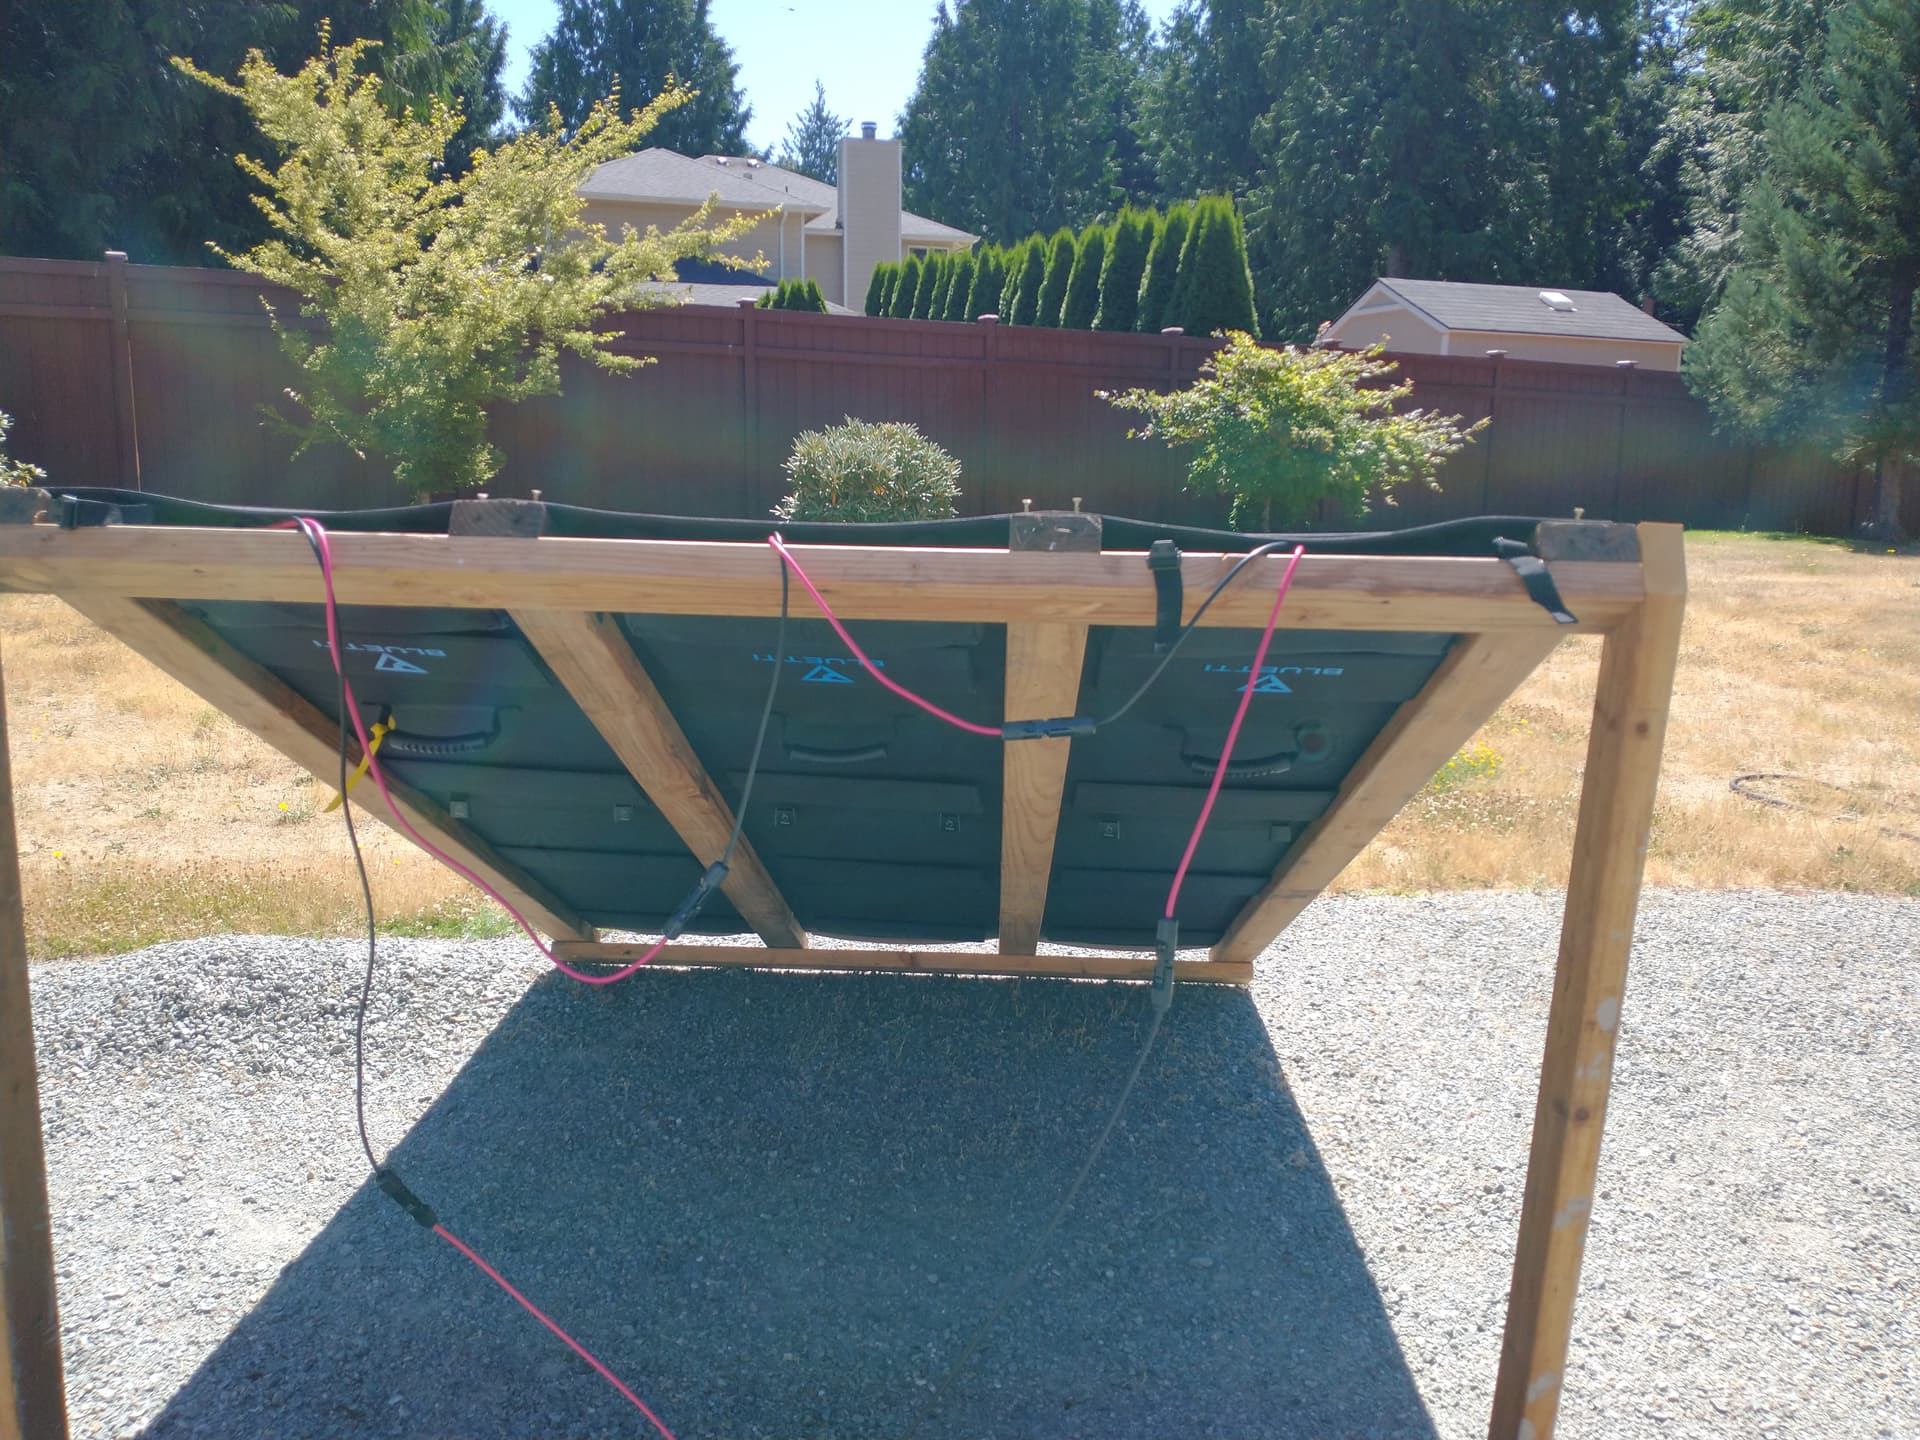
I like the way you put the solar cabling connections at the top. I didn’t do that with the SP120 arrays because they were only held in place by the t-slots, and the weight at the top would cause them to slide down, but with your system I can have them at the top - much easier! Did you work out a way to adjust the legs?
Again, really love this - did you post your pix on the Bluetti FB page? People there will love this. Thanks for sharing here!
I have 2 construction screws per panel sticking up about a 1/2 inch (see photo) so I can just set the folded up panel grommets over them and then I unfold the panel down the rack. Other than that gravity does the rest. Installing and removing the panels is a real fast process (5 minutes?) so they go indoors during the night or when there’s no sun.
If I were to expect some winds I might put some screws on the lower grommets or if the winds were to high they would go back in the house.
Haven’t worked out an easy leg adjustment yet. The rack is at 30 degrees which is about what our solar noon’s inclination is at the moment. The legs are held on with 3 construction screws so if I were to slide them down the rack a bit that would increase the angle but that’s not something I would want to do twice a day.
I don’t do Facebook but feel free to share the photo’s if you would like.
But yours is way more cost effective. I like the idea of being able to leave the frame out in the elements and just attaching the panels when needed. If I were to make the same arrays for the 200W Bluettis, I could only get two panels to an array in order to fit under the big array, because they are much bigger/wider. Yours is a great solution.
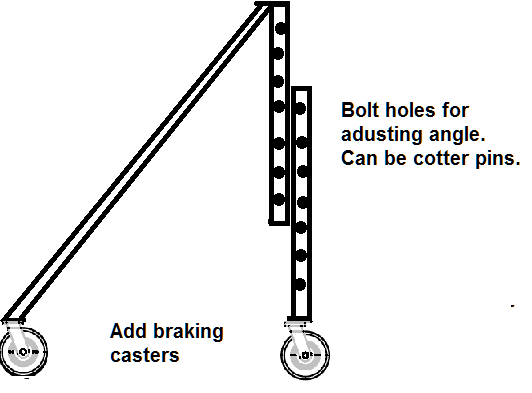
Here are my draft designs for a wood framed mounting system, based on your design. I would still only do a two panel system, partly because of space constraints and partly because it would be hard to reach to attach the center panel. With a two panel frame, I could sort of wheelbarrow it and not need wheels on the back.
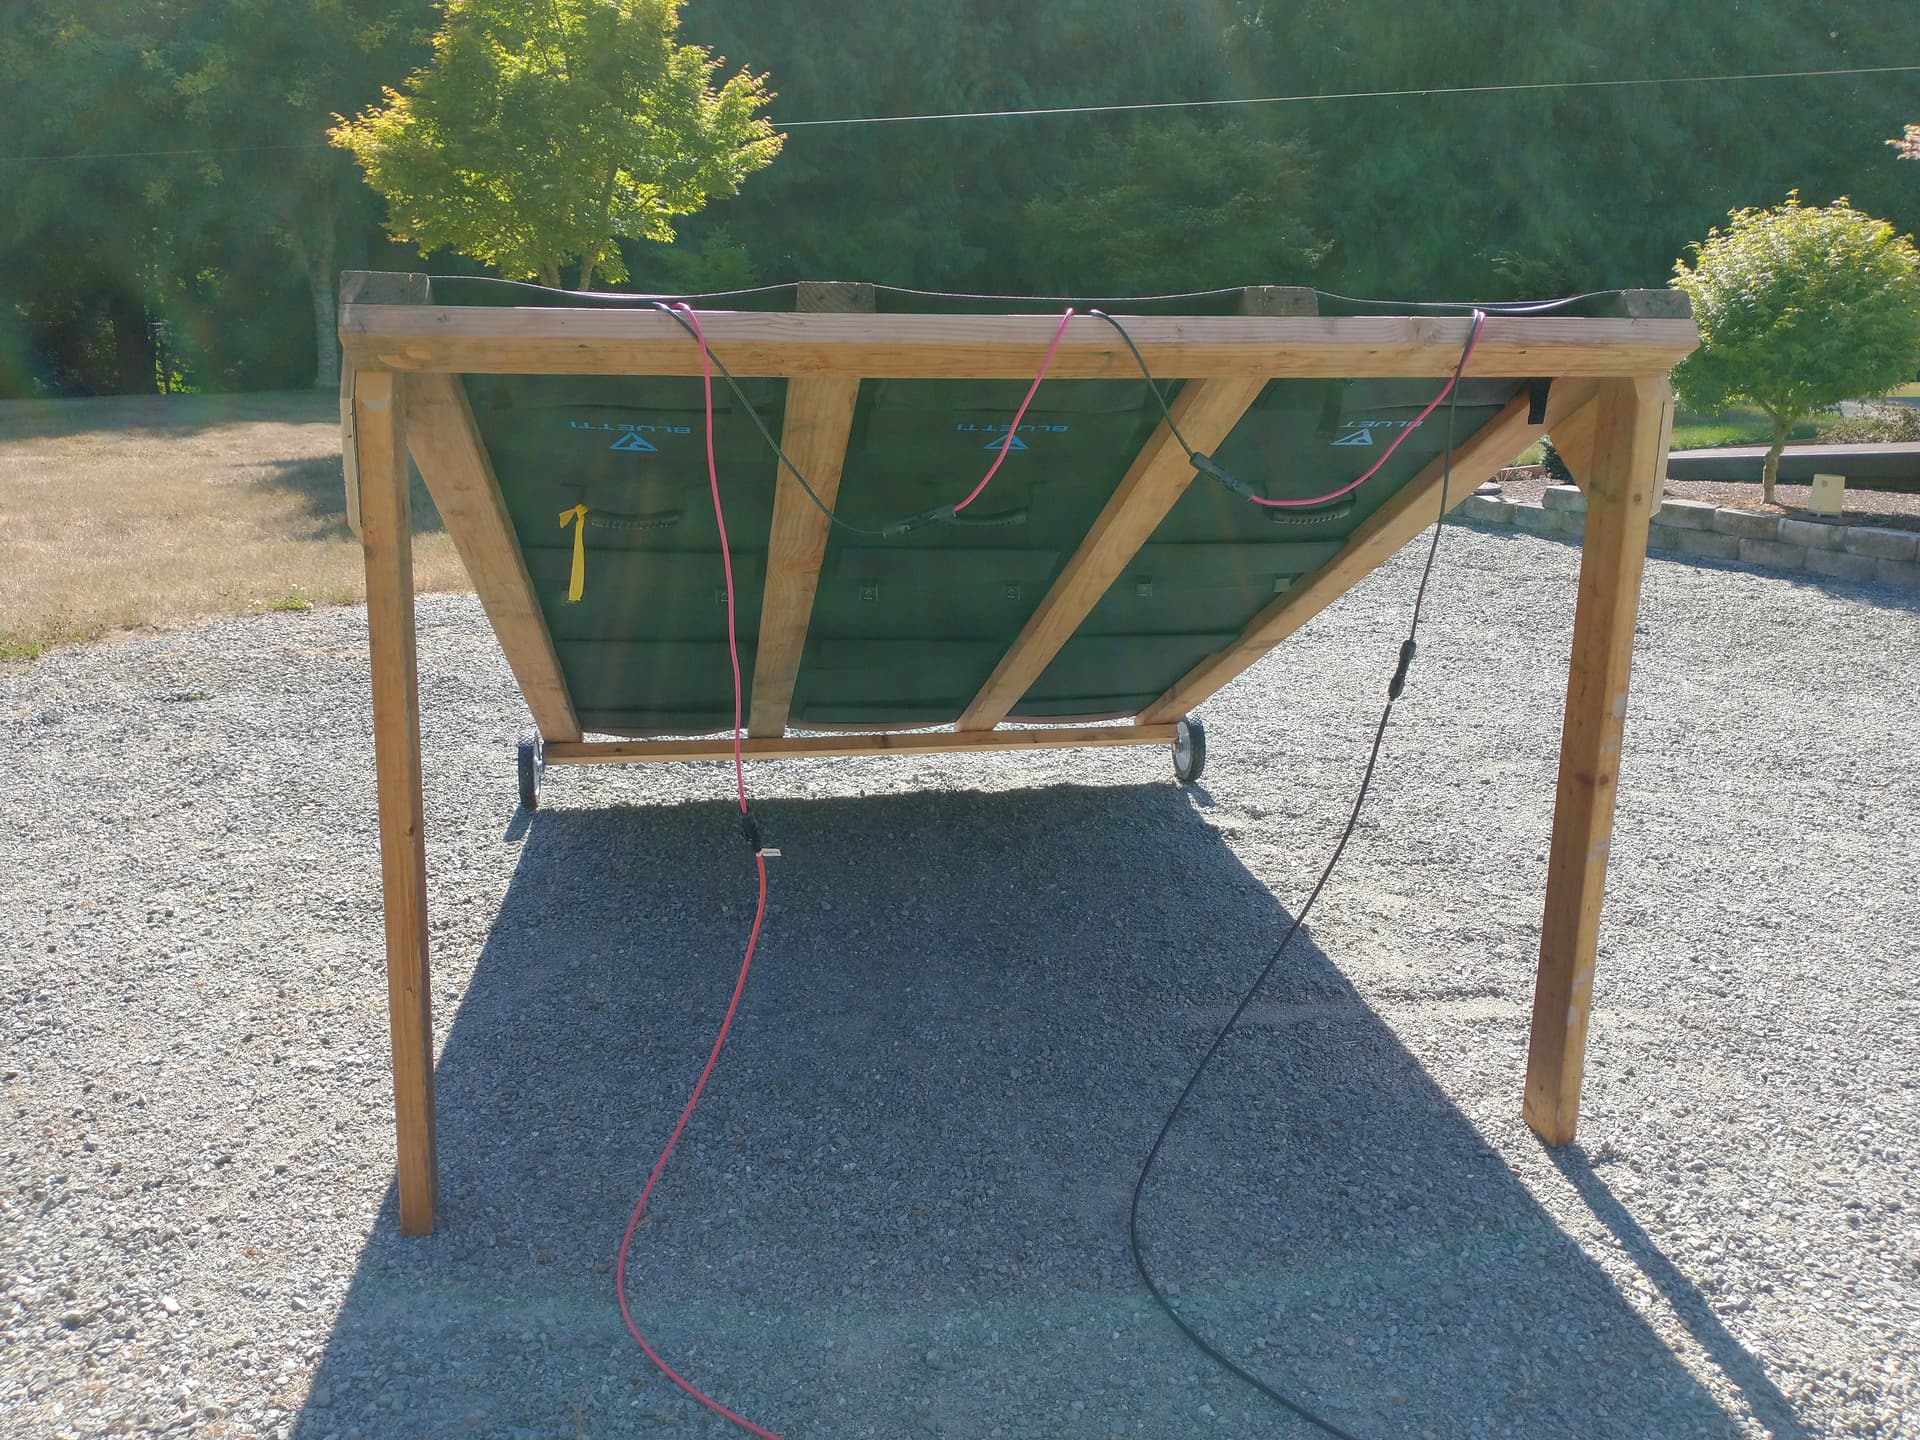
Yeah I was just thinking of adding wheelbarrow like handles to mine as I was moving it around this morning. A 2 panel wide design would make that easy!
Scrappy has a handle! well sort of, will add a better one to it soon. Even with just the 2x4 its much easier to move around plus it stiffened up the legs quite a bit. One hand on the handle and the other holding the extension cables out of the way. Total investment so far is $25 for the wheels and axles.
 .
.