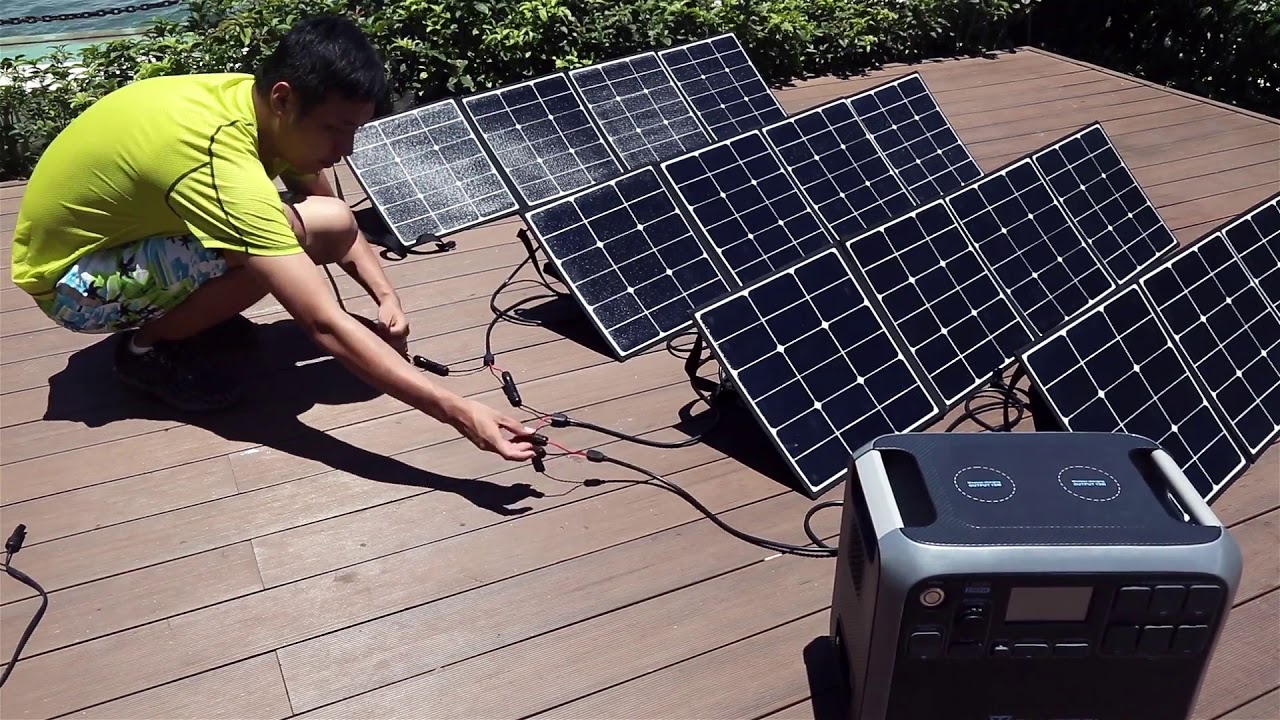
Received our AC200 and 2 solar panels today. How do I daisy chain the solar panels together? There was no included instructions for this.
You want to connect them in “series” which is a lot easier than it sounds. Here is what you do.
1-Lay two solar panels out any way you like but have the cable pairs end up together at the ending point. You will have one cable of two wires from the first solar panel and one cable of two wires from the second solar panel.
2-Take one wire from either panel cable and connect that wire to the wire in the other solar panel cable that it matches up with. Male to female or female to male. You can’t connect them wront. Don’t even worry about the color of the cables or the polarity.
3-You are now left with one non connected wire from panel #1 and one non connected wire from panel #2. Grab your MC4 solar charging cable (It has a yellow connector on one end and same type of connectors your solar panel cable has on the other end) and connect the two solar panel connectors (MC4) to the AC200 MC4 charge cable. Each of the two wires from your solar panels will only connect one way to the AC200 MC4 charging cable. You cannot connect them wrong.
4-Now grab your Aviation input cable (Has a black round metal fitting on one end and a kind of rectangular yellow fitting on the onther end) and connect its yellow end to the AC200 MC4 charging cable yellow end (kind of fun how you just match colors) that you just connected to your solar panels.
5-Now you should be left with a cable with the round black metal fitting, connected to your AC200 MC4 charging cable which is connected to your two solar panel wires. Look for a small red dot on the outer end collar of the black metal round fitting of the AC200 input cable you just attached. This red dot goes straight up. Push the round metal fitting firmly into the Aviation input fitting on the AC200 until you hear it click. Wiggly it around a little to make sure it is well seated. It should snap and lock in place and not pull back out.
6-That is all there is to it and the above can be accomplished in about 10 to 15 seconds. To remove the aviation fitting on the charging input cable attached to your AC200, there is a collar that goes around the outside of the round fitting. The collar must be slid outward until the fitting can be pulled away from the AC200.
Give it a try and I guarantee that you will be saying "hmmmmm that wasn’t nearly as hard as I thought. If you want to pl ace the AC200 further away from your panels, you can add extension cables to your existing cables to extend your reach up to about 100 feet. You can add additional solar panels up to six by connecting the same way and ending up with an unconnected wire at the end of the far left and the far right panel and connect the rest the same way. You need a minimum of 35 volts for the charging to begin up to a maximum of 150. (2 to 6 panels) . You also have to go to the AC “settings” menu and have “PV” selected and the incoming source. PV stands for Photo Voltaic. If you have anything else selected, charging wil not begin. Lastly after connecting everything you should see an incoming voltage appear in the screen. After this appears, be patient and about 30 seconds later you will see the incoming charging watts appear.
Thank you, incredibly simple now that I know the process. (;
